Creating content
Class overview
1. Working with Modules
2. Working with Layouts
3. Working with Text
4. Working with Images

1. Working with Modules
In this video we show you how to work with Modules in Divi, and we show you where you can preview the pre-styled modules we created for you.
Sample Image sizes in the pre-styled Modules
Many of our pre-styled modules have sample images, and if you’d like to replace the sample image, you can see the exact image dimension we’ve used by going to the module settings (click the gear icon to do so… see the screenshot below): ![]()
In the module, find where you can upload the image, and look at the file name of the dummy image. The sample image has the image dimensions in the file name. If you can’t see the complete file name in the box, place your cursor in the file name field and go to the right with the right arrow, or by using the “end”key on your keyboard. This image is 1280 x 768 pixels, so you could replace it with your own image of these dimensions to get the exact same look:

For more info on working with images, see the class on working with images.
Saving your own Modules
You can also save your own modules (or combinations of modules as rows and sections) to your Divi library.
So for example, if you have created a lovely email optin with your own brand colours, you may want to re-use it across your site. Or if you have combined the email optin with an image of your freebie next to it, you may want to save the whole section and re-insert it elsewhere on your site. In the toggle below you can find out how to save your own elements.
Saving your own modules
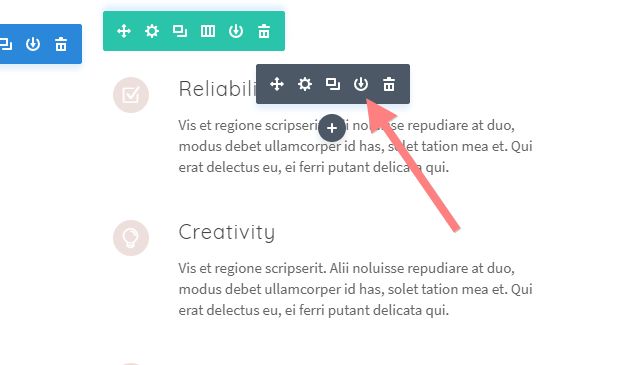
To save your own modules in the frontend builder, click on the save to library icon of any module:
Give your module a name:

You can also give your module a category, and create your own category at he bottom of the categories, this helps with organizing and finding things easily later:

Rows and modules also have these “save to library” icons:

Saving as Global items
You can also save your items as global items. A global item can be inserted in several places in your website, and if you change one of those items, all the others change along. This can be very useful for items that you’d want to be the same across your site.
Open the toggle below for more info.
Saving as global items
To save a module, section or row as a global item, when saving it to the library as described above, tick the “make this a global item” box :

Once an item is global it becomes green – below is a global item in the back-end – also in the visual builder global items have a green colour:

2. Working with Layouts
Layouts are combinations of modules to create specific pages that you can load from the library. With pre-made layouts it’s easy to build pages such as a sales page, contact page or a lead-page. You can use them as starting points and replace their content with your own. You can delete modules you don’t need, and insert others to make the page your own.
In the next video we show you what a layout is, how you can insert them into your page, where you can preview the pre-made layouts, and how you can just use parts of a layout. We also explain how you can save your own layouts.
2.1 Importing layouts
From time to time we update our layouts, or we create additional ones. You can easily import them into your website through the media library. In Divi you import and export them as files with the extension .json
You can view and download the latest version of our layouts in the Layout Library.
In the toggle below we show you how to import layouts into your Divi Library:
How to import layouts
Next to the layouts that come as standard with your theme, you can also save your own layouts, as you saw in the video.
You can also import additional layouts. For example, we may from time to time release a new layout that you might like to use. And we also update our existing layouts from time to time as new functionality comes along. You can add new layouts to your website by importing them, and here’s how that works:
Step 1: get your layout(s) file ready
When someone shares a layout or layout pack with you, you receive it as a ‘.json’ file. This is what that looks like after you’ve downloaded the file and saved it on your computer:

These .json files can be just one layout, or they can be a pack with several layouts, the procedure is the same.
Step 2: Add the new layout(s) to your library
Go to your dashboard and in the menu on the left navigate to Divi > Divi Library:

Once in the library, you see an overview of the layouts already available to you. And now you can click the ‘Import/Export’ button at the top to import your new layout(s).

A dialogue module comes up. In there select the ‘import’ tab and locate your file. Then press the blue button at the bottom to import the layout(s).

Your new layouts get imported and once done they appear in your library. You can now load these layouts in into a page as usual.

2.2 Cleaning up older layouts
In the toggle below we explain how your can clean up older layouts from your Divi Library:
Cleaning up older layouts
Cleaning up older layouts
To clean up any older layouts from your site, after you have imported new layouts, go to your Divi Library:

In the top menu, choose Layouts from the Drop down as shown below, then click on filter, to only show all *layouts* in the library. You will now see a list of all layouts that are present in your library. Next to the layouts that came with your website pack, there may also be layouts that you have created and saved yourself here.

So now you need to look through the list, and click on the tick box in front of all the layouts that you’d like to delete. In the screenshot above we have highlighted one layout in yellow that has Divine Website Pack in the file name, so go through the list and look at all the layouts with Divine Website Pack in the file name, check the version number (Layouts with no version number are our oldest layouts, followed by version 1, version 2, etc.) and tick the box in front of those you no longer need, then select Bulk Actions > Move to Trash and click Apply to delete.

If you accidently trashed layouts you still need, you can go to trash:

There you can restore them one by one, or you can tick the boxes of items you’d like to restore and use bulk actions to restore several items in one go:

3. Working with text
In the next two videos we show you how to work with text in your Divi site. There are a number of tricks and things to know, that can make working with text very efficient and give you a smooth experience, in particular when working in the visual builder in the frontend of your website.
4. Working with Images
In this video we show you a few important things to know about working with images in your website.