Creating content with your Child Theme
Class overview
In this class we’ll explain what a Child Theme is, and how you can use its features to create a stunning website.
1. What is a Child Theme?
A Divi Child Theme is a pre-made design for your Divi website. The Standard Divi Theme offers a tremendous amount of settings, for the overall website, and for its’ modules. With the settings you can create some very different looking websites, but to achieve an overall look – a beautiful design- all across your site and for all the modules is actually hours and hours of work.
A Divi Child theme gives you that out of the box. We have made site wide settings for the header & navigation, fonts, colours and we have also created a coordinated look for all the Modules that Divi offers. Instead of inserting module from the Divi standard modules, and having to make many many settings, you can use the Dawn Theme Modules from the library and effortlessly create your website with a stylish look throughout your website. All the Dawn Modules can be previewed in the Dawn Module Library, and you’ll also find tips here on how to use and customize each Module.
We have also created a set of Layouts, premade page designs that are a great starting point. You can adapt the layouts to your own needs by replacing the content, deleting modules that you don’t need, and adding modules you’d like to use.
As part of our website package, we have also placed some dummy content. This means that there are already a few pages, a menu for you to start working with and that you can start to edit. This is much easier than starting with a complete blank slate.
Learn more below about using the Modules, the Module Library and working with Layouts below.
2. Creating basic content with the text editor
You’ll be creating some amazing page layouts with the Modules, but basic text is created with a text editor, and also most of the modules have an integrated text editor. In the next video we’ll show you how to work with the text editor. We’ll start with the basic WordPress editor, followed by the Divi Visual Builder editor, both in a module and working live in the page.
Let’s Go!
Useful & Important Tip when copying text across from another source:
You will most likely at some point want to copy text across, from for example a text editor document or another website, into your Divi page. When you use simply copy and paste ( with shortcuts that would work like this: Ctrl + A to select the text, Ctrl + C to copy, and then Ctrl + V to paste – replace ctrl by Command for Mac users ) you don’t only copy the text, but also any formatting of that text, i.e. font, size, colour. You will most likely want the text to get the formatting as set in your new website.
To ensure you only copy the text and not the formatting, use a super simple super simple text editor that doesn’t add any formatting to your text. On a Windows computer this would be Notepad, on a Mac this would be Textedit. Copy and past your text first into the text editor, so that it loses any formatting, and then copy it from there in to your page.
Creating Links that open in a new tab/window:
A quick video with some tips on how and why to create links that open in a new Browser Tab/Window:
3. Working with the Child Theme Modules
Modules are the website elements that you can use to build your pages with. Modules are inserted in your row columns, as we explained in the classes about working with the Divi Builder. There are all sorts of modules; text and image modules, newsletter optins, call to actions, sliders, headers.
As part of your Child Theme, you have a full collection of premade Child Theme Modules with an overall coordinated look which makes it easy to create a stylish and stunning website.
Moreover, the premade modules have dummy content. So when you insert one of the Dawn Theme modules, you can immediately see the module, and replacing the dummy content is way easier than starting with a blank slate (like is the case with standard Divi modules).
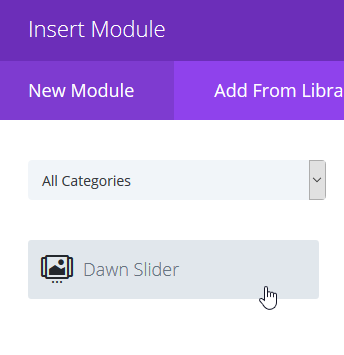
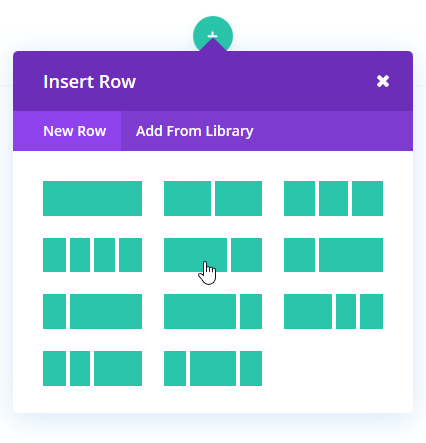
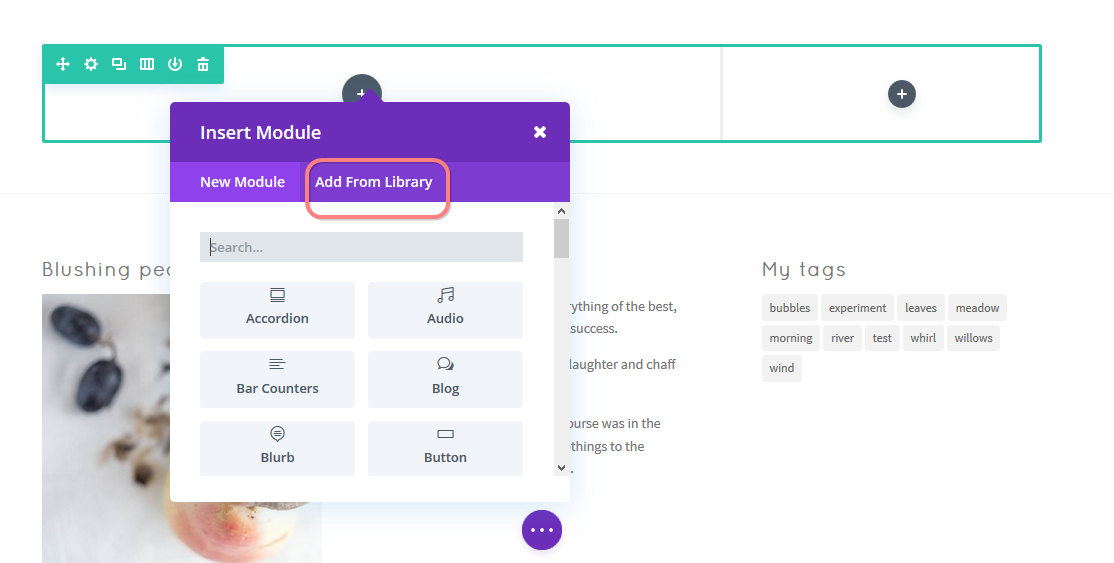
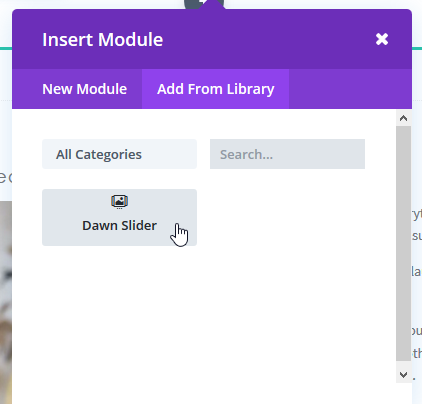
Instead of inserting modules from the standard Divi selection under “New Module”, you’ll head over to “Add From Library to load the Child Theme modules from there:

Please note that at the top you can choose a category, or use the search function to quickly find the Module you need.
Now we’ll show you the basics of working with your Child Theme Modules in the following video:
Please note: Many of our pre-styled modules have dummy images, and if you’d like to replace the dummy image, you can see the exact image dimension that we have used by going to the module settings (the screenshot shows the visual builder): ![]()
In the module, find where you can upload the image, and look at the file name of the dummy image. The dummy image has the image dimensions in the file name. If you can’t see the complete file name in the box, place your cursor in the file name field and go to the right with the right arrow, or by using the “end”key on your keyboard. This image is 1280 x 768 pixels, so you could replace it with your own image of these dimensions, or of course use any other height for your image: 
For more info on working with images, see our class on images.
4. The Divine classroom Module Library
In the Divine Classroom Module Library, you can see a preview of each Child Theme module, explanations on how to set your own content, plus design tips on how to use the module. You can find it in the classroom menu above under Module Library.
The Child Theme elements are either inserted as a module or as a section. The two tutorials below show you how to do this.
4.1 Inserting Modules from the Library
Open the toggles below to learn how a module is inserted in your page with the Backend Builder or the Visual Builder:
Inserting Modules from the Library - Backend Builder
Adding modules with the backend builder:
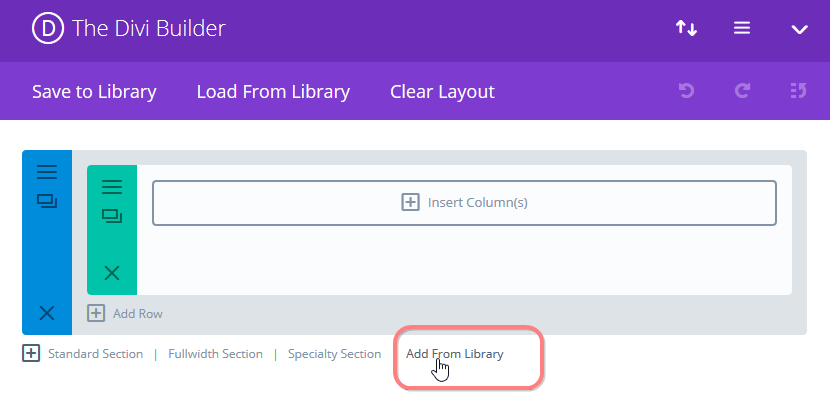
Modules are inserted into columns. Columns are inserted in Rows. Rows are set up within the sections. So you first have to start with setting up the section.
If you are inserting a module with Full Width in the name, you will have to insert a Fullwidth Section.
In Full width sections you can directly insert modules, you don’t need to set up a column structure like for regular sections, so you can skip the following first steps for setting up the columns and jump straight in to adding your module, marked with *** further below.
In the screenshot below a section is already present (blue), with a row in it (green), but the columns are not set up yet. (If you don’t have a section like this set up yet, add a new regular section by clicking on the “Standard Section” option at the bottom of the last section (as seen at the bottom of this image)).
Click on insert Column(s):
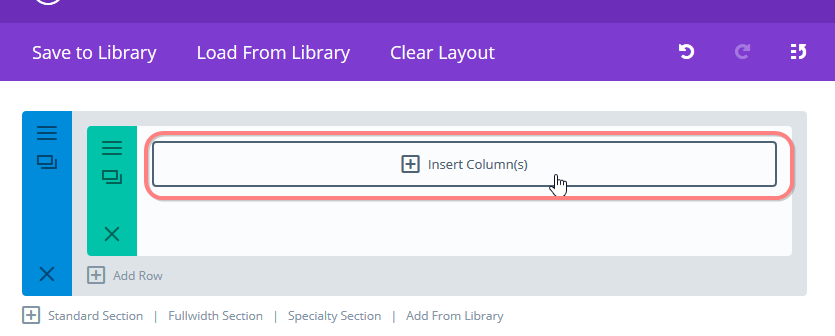
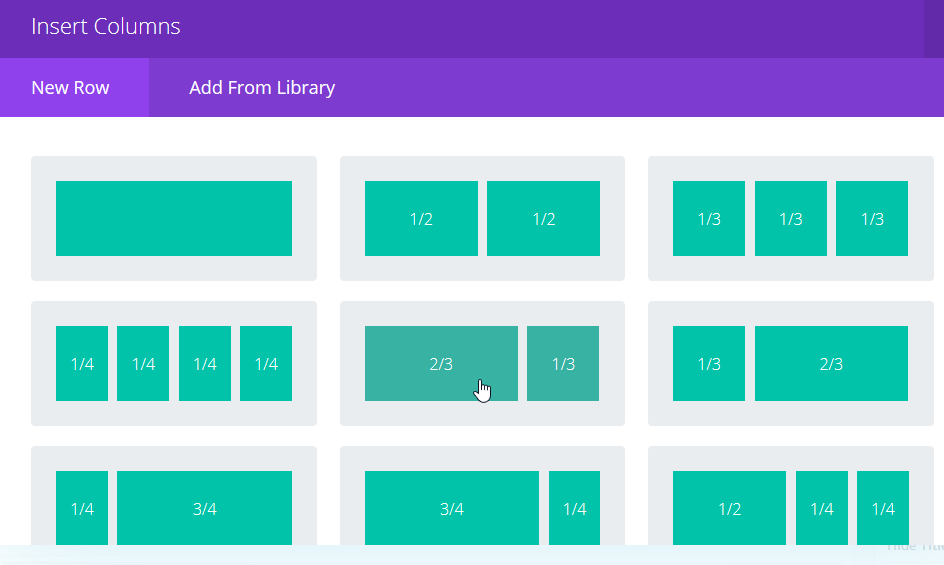
A dialogue opens asking you to choose a column structure. Choose the column set-up that you’d like to use:
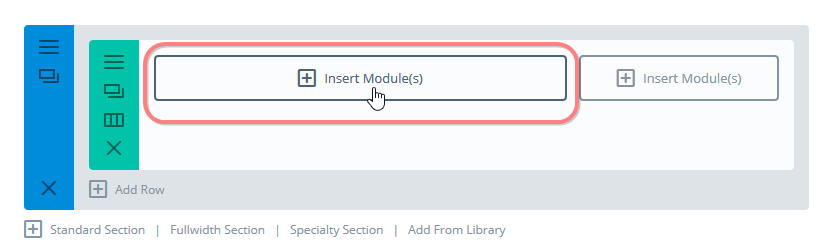
Then, add modules to the column items that you have set up by clicking “insert module(s)” ;
*** if you inserted a full-width section this is also where you pick up the tutorial again:
In the dialogue – choose “add from Library”:
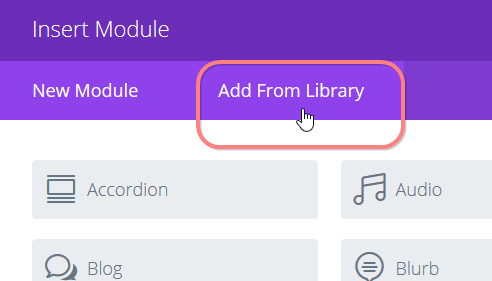
Insert the module of your choice:
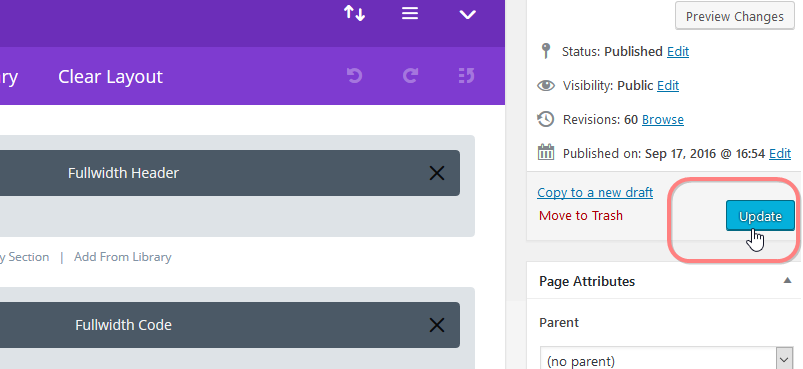
Don’t forget to regularly save your work by clicking the update button:
Inserting Modules from the Library - Visual Builder
Adding modules with the Visual Builder:
Navigate to the page that you want to work on (the Divi Builder already needs to be active on this page) and click on “Visual Builder” in the Admin Bar at the top of your website:

The visual builder becomes active.
If you work on an empty (new) page, just hover over the empty space and the frameworks of the first empty section and row will appear (this empty row and section is inserted as standard by Divi when you activate the builder on a new empty page).
You’ll see two plus signs, green represents the row, and blue represents a section. Click on the green plus sign to add a row:
![]()
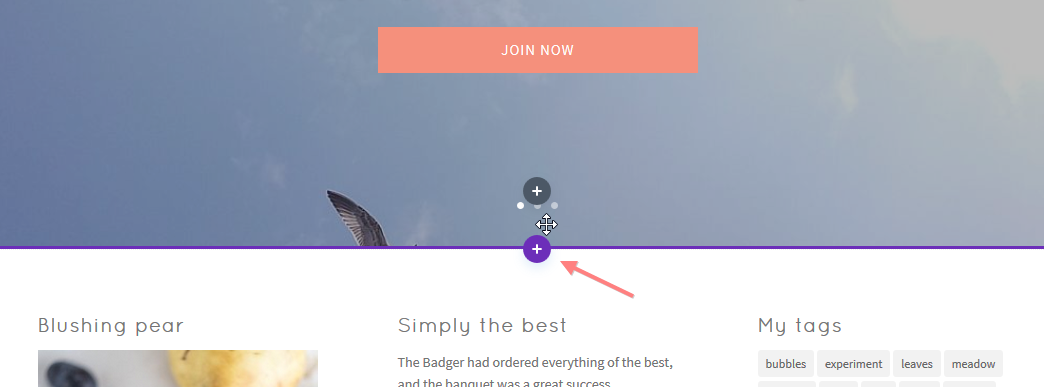
If you’re working on a page with existing content it works a tiny a bit different: you first have to insert a section before you can insert the row; hover near the end of the item after which you want to insert your row.
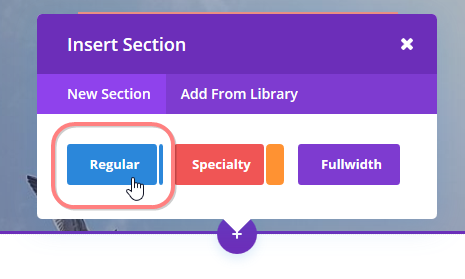
You’ll see a purple or blue plus sign for the section, (ignore the grey plus sign which is for editing the module content above – A blue dot represents a regular section, a purple dot represents a full-width section. Whether a blue or purple dot appears depends on what type of content is present above, but it doesn’t matter for inserting a new section). Click on the blue or purple dot to first insert a new regular section :
A dialogue opens asking you what kind of section you’d like to add. Choose “regular”:
You have now finished inserting the section and continue with inserting the row with it’s column structure.
Click on the column structure of your choice:
Choose “Add From Library”:
Add the Module of your choice:
Saving your work in the visual builder
Don’t forget to save your work by clicking the purple button with the dots, followed by the green save button at the bottom of your screen.

4.2 Inserting Sections from the Library.
Open the toggles below to learn how a section is inserted in your page with the Backend Builder or the Visual Builder:
Inserting Sections from the Library - Backend Builder
Adding sections with the backend builder:
The options for adding sections to your pages are found to the right of the black plus icon.
To add a Dawn building element that should be inserted as a section to your page, click on the “add from Library” option:
The section library opens and shows the available elements. You can sort the elements by category at the top if there are many. Click on the item you would like to insert.

Don’t forget to save your work by updating your page.
Inserting Sections from the Library - Visual Builder
Adding sections with the Visual Builder:
Navigate to the page that you want to work on (the Divi Builder already needs to be active on this page) and click on “Visual Builder” in the Admin Bar at the top of your website:
The visual builder becomes active.
If you work on an empty (new) page, just hover over the empty space and the frameworks of the first empty section and row will appear (this empty row and section is inserted as standard by Divi when you activate the builder on a new empty page).
You’ll see two plus signs, green represents the row, and blue represents a section. Click on the blue plus sign to add a section:
![]()
If you’re working on a page with existing content it looks a bit different: hover near the end of the item after which you want to insert your section.
You’ll see a purple or blue plus sign for the section, (ignore the grey plus sign which is for editing the module content above – A blue dot represents a regular section, a purple dot represents a full-width section. Whether a blue or purple dot appears depends on what type of content is present above, but it doesn’t matter for inserting a new section). Click on the blue or purple dot:
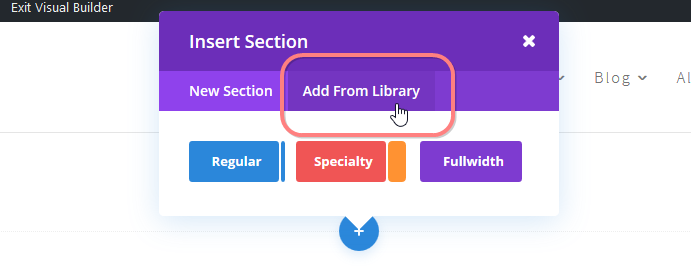
A dialogue opens to insert a section. Choose “add from Library”:
The section library opens and shows the available elements. You can sort the elements by category at the top if there are many. Click on the item you would like to insert.
Saving your work in the visual builder
Don’t
forget to save your work by clicking the purple button with the dots,
followed by the green save button at the bottom of your screen.
5. Saving your own modules, rows and sections
It is also possible to save your own modules, rows and sections to the library. For example, if you have created a lovely email optin, you may want to re-use it across your site. if you have combined the email optin with an image of your freebie next to it, you may want to save the whole section and re-insert it elsewhere on your site.
To save Modules, rows or sections, click on the settings icon in when you are using the back-end Divi Builder – here the settings icons of the section and module are highlighted :
![]()
Then, click “Save & Add to Library” in the bottom left:

Now you can give your template a name. You can also give it a category – it’s possible to create your own additional categories underneath the existing categories, this will help in keeping your saved items organized and to find them again later:

In the visual builder you can save modules, rows and sections by clicking on the “save to library icon” – below here those icons for a module and section are highlighted :
![]()
Saving as global items
It is possible to save your items as global items. A global item can be inserted in several places in your website, and if you change one of those items, all the others change along. This can be very useful for items that you’d want to be the same across your site. To save a module, section or row as a global item, when saving it to the library as described above, tick the “make this a global item” box :

Once an item is global it becomes green – below is a global item in the back-end – also in the visual builder global items have a green colour:

6. Working with the Layouts
Layouts are combinations of modules to create specific pages that you can load from the library. With pre-made layouts it is easy to build pages such as a sales page, contact page or a leadpage. You can use them as a starting point and replace their content with your own. You can delete modules you don’t need, and insert others to make the page your own.
The video below shows you how to work with your Child Theme’s premade layouts. Please also see the two important notes underneath the video!
Please note: Divi recently started offering a number of premade layout packs themselves, so when you start with loading layouts into your pages, you’ll come across them, and this can be confusing. You’ll first see the preview of the divi layouts, they are under the tab “premade layouts – but the Divine Website pack layouts can be found under the tab “Your Saved Layouts”:
You can also try some of these layouts for your site – but of course their design is not in line with the design of your Divine Website Pack :)

Important info: When loading layouts into your page, you’ll notice a tick box at the top of your screen that says “replace existing content”. When this box is ticked, the new layout will replace any content that was already on the page. If you untick the box the content of the layout will be added at the bottom of anything that was already there. See screenshot showing the tick box below:

7. Saving your own layouts
If you have created a page that you’d like to use as a template for future use, or for other similar pages that you’ll be creating, you can save that page as a layout.
To do this in the Visual Builder, click the “Save to Library” icon at the bottom of your page:

To save a page layout in the Backend Builder, click “Save to Library”:

8. Importing layouts
Next to the layouts that come as standard with your theme, you can also save your own layouts, as we have shown above.
You can also import additional layouts. For example, we may from time to time release a new layout that you might like to use. And we also update our layouts from time to time . You can add new layouts to your website by importing them, and here’s how that works:
Step 1: get your layout(s) file ready
When someone shares a layout or layout pack with you, you receive it as a json file. This is what that looks like after you’ve downloaded the file and saved it on your computer: 
These .json files can be just one layout, or they can be a pack with several layouts, the procedure is the same.
Step 2: Add the new layout(s) to your library
Go to your dashboard and in the menu on the left navigate to Divi > Divi Library:  Once in the library, you see an overview of the layouts already available to you. And now you can click the ‘Import/Export’ button at the top to import your new layout(s).
  A dialogue module comes up, In there select the ‘import’ tab and locate your file. Then press the blue button at the bottom to import the layout(s).
  Your new layouts get imported and once done they appear in your library. You can now load these layouts in into a page as usual.