Inserting Modules from the Library
Open the toggles below to learn how a module is inserted in your page with the Backend Builder or the Visual Builder:
Inserting Modules from the Library - Backend Builder
Adding modules with the backend builder:
Modules are inserted into columns. Columns are inserted in Rows. Rows are set up within the sections. So you first have to start with setting up the section.
If you are inserting a module with Full Width in the name, you will have to insert a Fullwidth Section.
In Full width sections you can directly insert modules, you don’t need to set up a column structure like for regular sections, so you can skip the following first steps for setting up the columns and jump straight in to adding your module, marked with *** further below.
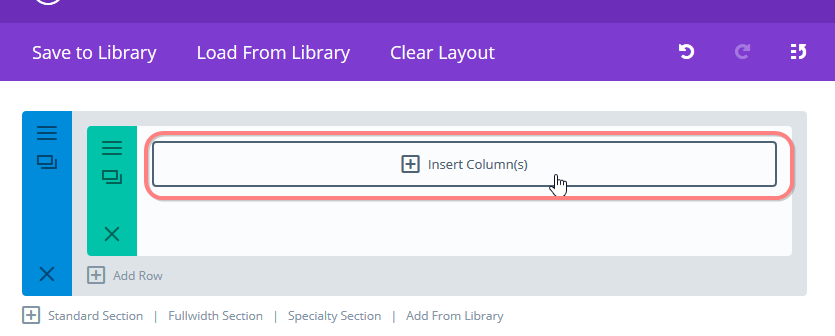
In the screenshot below a section is already present (blue), with a row in it (green), but the columns are not set up yet. (If you don’t have a section like this set up yet, add a new regular section by clicking on the “Standard Section” option at the bottom of the last section (as seen at the bottom of this image)).
Click on insert Column(s):
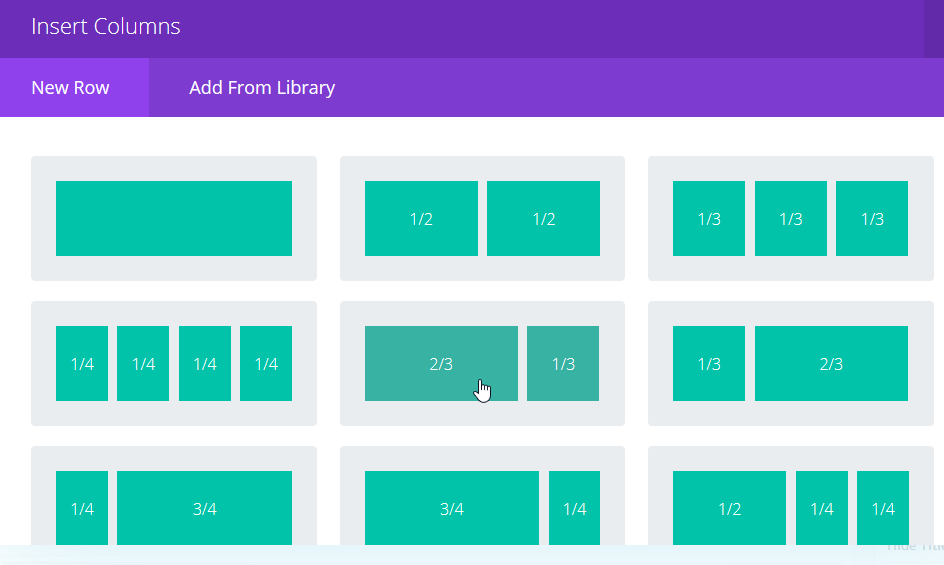
A dialogue opens asking you to choose a column structure. Choose the column set-up that you’d like to use:
Then, add modules to the column items that you have set up by clicking “insert module(s)” ;
*** if you inserted a full-width section this is also where you pick up the tutorial again:
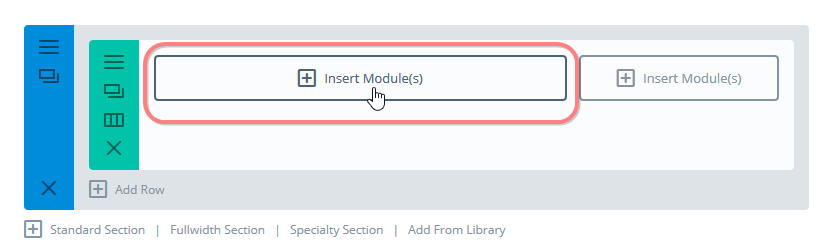
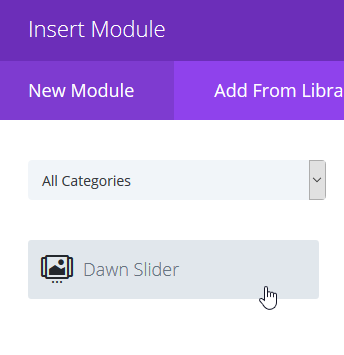
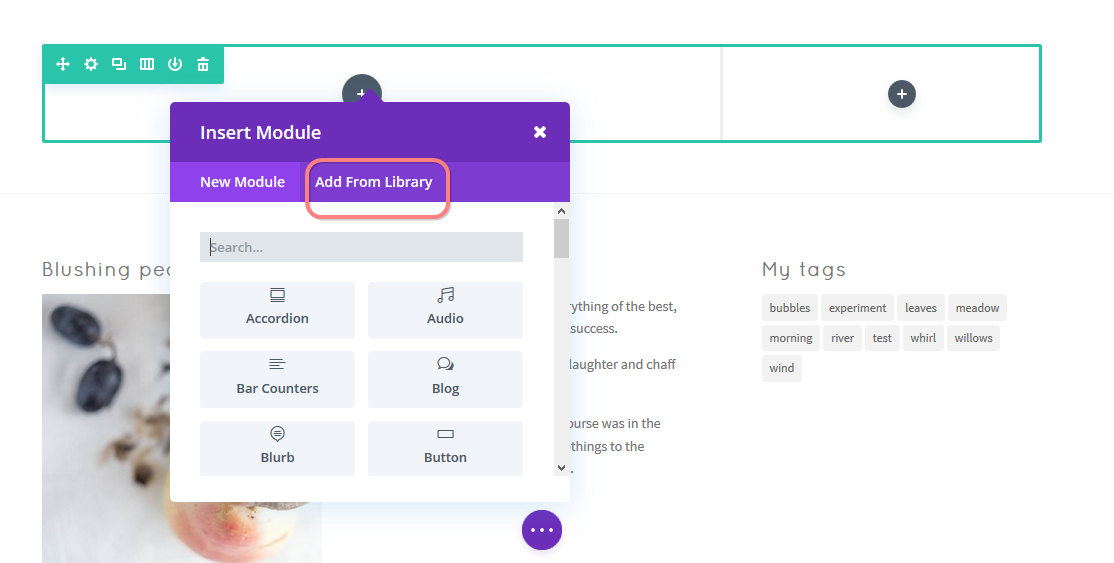
In the dialogue – choose “add from Library”:
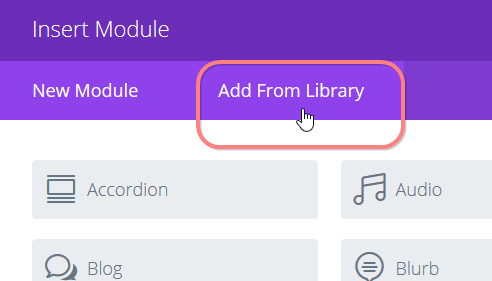
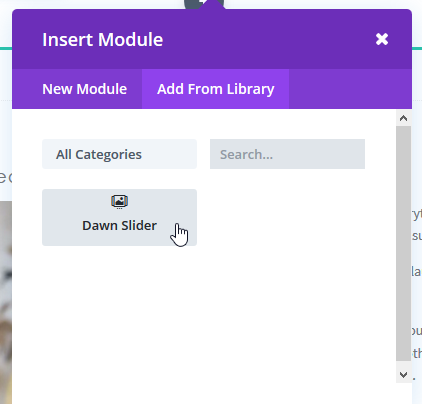
Insert the module of your choice:
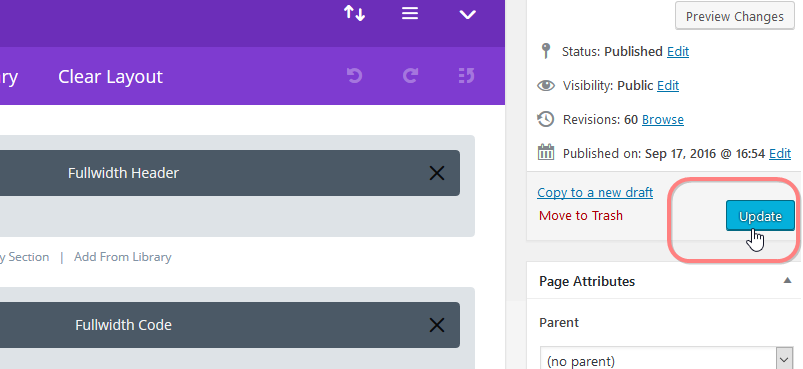
Don’t forget to regularly save your work by clicking the update button:
Inserting Modules from the Library - Visual Builder
Adding modules with the Visual Builder:
Navigate to the page that you want to work on (the Divi Builder already needs to be active on this page) and click on “Visual Builder” in the Admin Bar at the top of your website:

The visual builder becomes active.
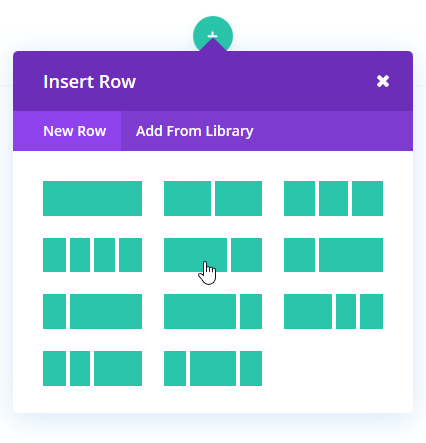
If you work on an empty (new) page, just hover over the empty space and the frameworks of the first empty section and row will appear (this empty row and section is inserted as standard by Divi when you activate the builder on a new empty page).
You’ll see two plus signs, green represents the row, and blue represents a section. Click on the green plus sign to add a row:
![]()
If you’re working on a page with existing content it works a tiny a bit different: you first have to insert a section before you can insert the row; hover near the end of the item after which you want to insert your row.
You’ll see a purple or blue plus sign for the section, (ignore the grey plus sign which is for editing the module content above – A blue dot represents a regular section, a purple dot represents a full-width section. Whether a blue or purple dot appears depends on what type of content is present above, but it doesn’t matter for inserting a new section). Click on the blue or purple dot to first insert a new regular section :

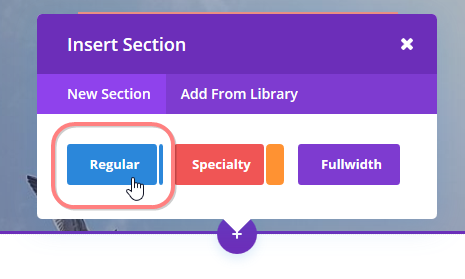
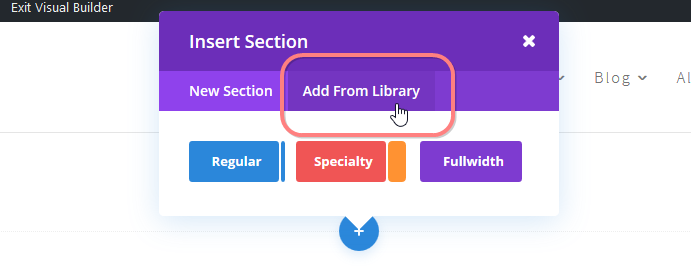
A dialogue opens asking you what kind of section you’d like to add. Choose “regular”:
You have now finished inserting the section and continue with inserting the row with it’s column structure.
Click on the column structure of your choice:
Choose “Add From Library”:
Add the Module of your choice:
Saving your work in the visual builder
Don’t forget to save your work by clicking the purple button with the dots, followed by the green save button at the bottom of your screen.

Inserting Sections from the Library.
Open the toggles below to learn how a section is inserted in your page with the Backend Builder or the Visual Builder:
Inserting Sections from the Library - Backend Builder
Adding sections with the backend builder:
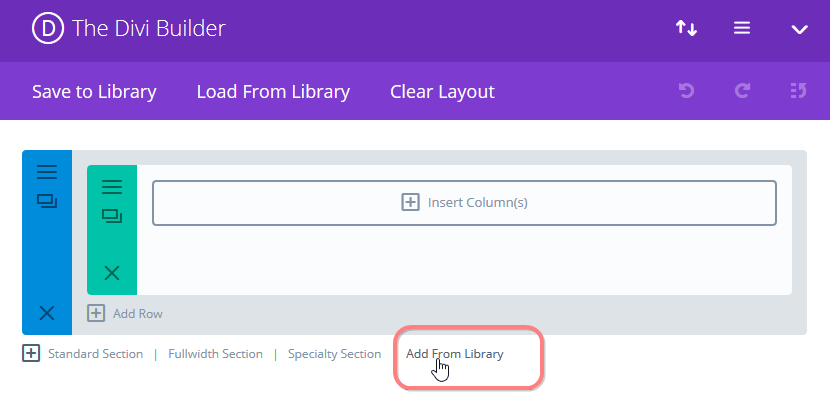
The options for adding sections to your pages are found to the right of the black plus icon.
To add a Dawn building element that should be inserted as a section to your page, click on the “add from Library” option:
The section library opens and shows the available elements. You can sort the elements by category at the top if there are many. Click on the item you would like to insert.

Don’t forget to save your work by updating your page.
Inserting Sections from the Library - Visual Builder
Adding sections with the Visual Builder:
Navigate to the page that you want to work on (the Divi Builder already needs to be active on this page) and click on “Visual Builder” in the Admin Bar at the top of your website:
The visual builder becomes active.
If you work on an empty (new) page, just hover over the empty space and the frameworks of the first empty section and row will appear (this empty row and section is inserted as standard by Divi when you activate the builder on a new empty page).
You’ll see two plus signs, green represents the row, and blue represents a section. Click on the blue plus sign to add a section:
![]()
If you’re working on a page with existing content it looks a bit different: hover near the end of the item after which you want to insert your section.
You’ll see a purple or blue plus sign for the section, (ignore the grey plus sign which is for editing the module content above – A blue dot represents a regular section, a purple dot represents a full-width section. Whether a blue or purple dot appears depends on what type of content is present above, but it doesn’t matter for inserting a new section). Click on the blue or purple dot:
A dialogue opens to insert a section. Choose “add from Library”:
The section library opens and shows the available elements. You can sort the elements by category at the top if there are many. Click on the item you would like to insert.
Saving your work in the visual builder
Don’t
forget to save your work by clicking the purple button with the dots,
followed by the green save button at the bottom of your screen.