The “Dawn Email Optin” module can be added to your row columns.
For the email optin module to work you need to connect it to your email service provider. Also see our class Email Optins/Newsletter Subscriptions for more info.
We recommend Mailchimp as a good service to work with, you can start with their free plan which gives ample opportunity to grow your newsletter list and it also offers free automation.
But the module also works with a wide range of other newsletter service providers, including ConvertKit, Mailerlite, Mailster, Infusionsoft, Ontraport, iContact, HubSpot, Emma, MadMimi, GetResponse, Feedblitz, ConstantContact, Sendinblue, ActiveCampaign, SalesForce, CampaignMonitor, and MailPoet.
In the example below we explain how to connect Mailchimp up with your optin module. It works in a similar way for the other newsletter service providers.
For the very first email optin module, you’ll have to set your API key. Once you have set your API key once, for every Email Optin module you insert, the API link will already have been made and you can simply select the correct list. Let’s set the API key now for the first time. Let’s open the email account tab:

In there you can select the newsletter provider you’d like to connect, in our case Mailchimp, from the drop down and then click add:

Two fields appear that you have to fill in:
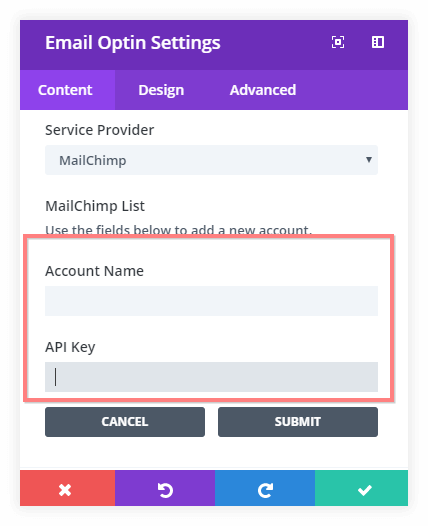 Your account name is your mailchimp user name.
How to find your API key for Mailchimp is described here.
Fill in the fields and click Submit. Once you have done that you can now select a list from the drop down; if you have only one list set up, it will only show that list, if you have several lists in your Mailchimp account, you can choose from the lists available (so you can create optins connecting to different lists, for every email optin module you place you can choose which list o connect to). Here I select the only list available in the Mailchimp account of Heartshapedlife, the Heart-shaped Life list:

If you have just created a new list in Mailchimp but it doesn’t show up yet in your email optin module, you can click the “Fetch Lists” button, so that it reloads the lists available.
Other settings for the module are similar to those for the other modules.
You can set a title & button text, and get creative with the background options.
The body text can be edited in the text editor at the bottom of the general tab.
On the design tab there are many options to further customize the design of your module, should you wish to do so.