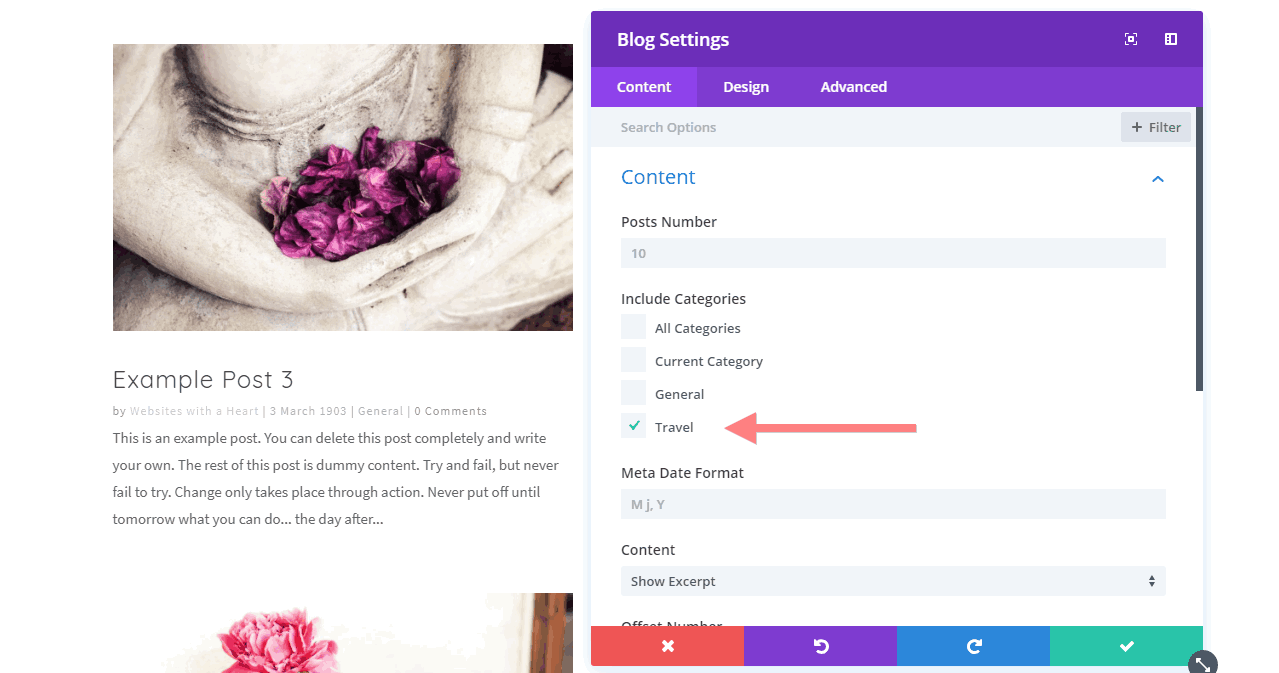
Blog Roll Page options
Here we explain two options for your blog roll page:
1. Using the Divi Blog Roll Standard module
When using the Divi Blog roll Module to display your blog posts, you can have more control over what you show as preview on your blog roll page.
You can see an examples here below, first the standard Divi & WordPress way of showing your blog posts on your blog roll, as you will have it if you haven’t changed anything yet, and below that using the Divi Blog roll module. Please note that
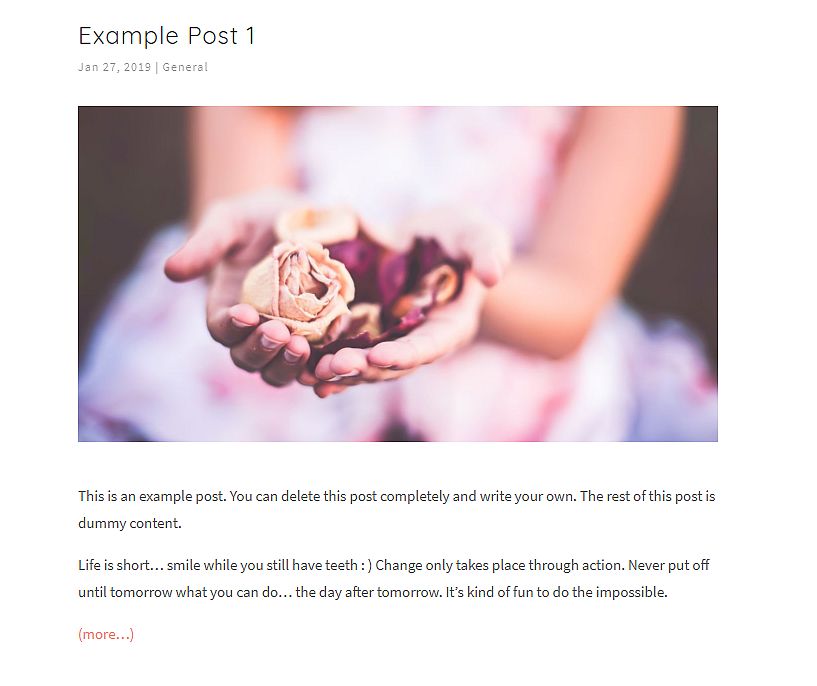
Standard WordPress post preview:
Posts are shown with an image first, followed by title and truncated text. it is not possible to choose yourself how much of your text you’d like to show in your preview. Please note that you can customize the types of metadata you’d like to show under the post title, eg author, comments, category.
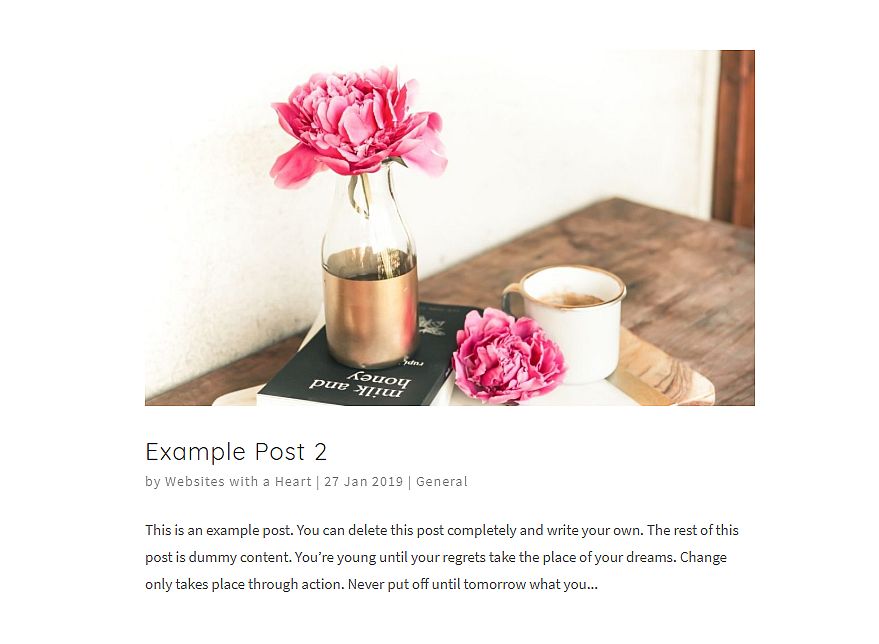
Divi Blog Module post preview:
Post previews are shown with title first, followed by image, followed by the start of your blog post text. We can decide ourselves when the preview ends, by inserting a “more tag” in our content. Choosing this way of showing your blog posts also means you could create a custom sidebar using divi modules, instead of the WordPress sidebar you create in your Appearance > Widgets area. Please note that you can customize the types of metadata you’d like to show under the post title, eg author, comments, category.
Setting your blog roll page up with the Divi Blog Roll Module
First we are going to prepare your new blog roll page. To do so, create a new page and give it the title Blog New. Save the draft, and Click using the Divi Builder.
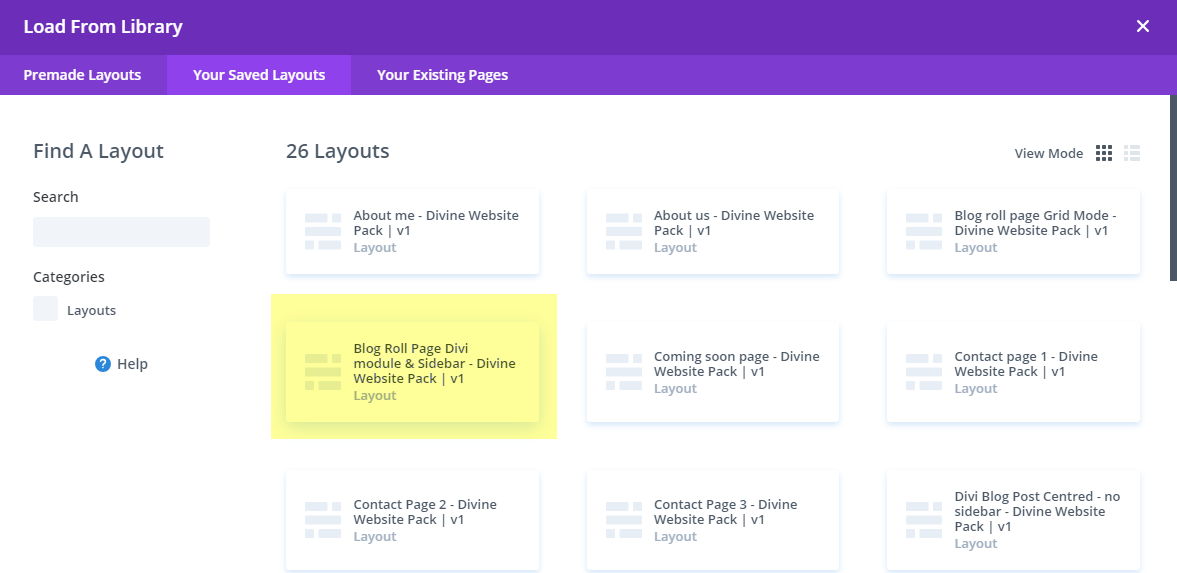
Load the layout “Blog Roll Page Divi Module & Sidebar – Divine Website Pack” from your library into your page (the version number can vary, depending on when you bought your pack, to check if you have the latest version, go to the Layout Library, where you can always download the latest version).
You now see a special section, that allows you to have a sidebar, which is called a Speciality Section.
There is a row width a Full Width Blog Module, and Sidebar Module next to it:
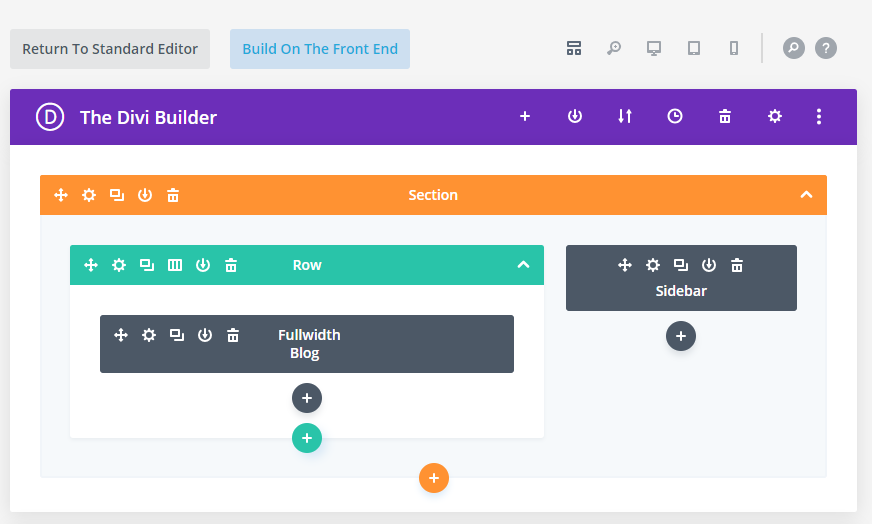
The sidebar module is set up to display the standard WordPress Sidebar as set up in Appearance > Widgets. You can also set another sidebar to display here, or use Divi modules to fill this space. See here for more information on how to do this.
Tweaking the Blog roll Module Settings
You can open the Fullwidth Blog module, to tweak some of the settings. We don’t describe all settings here, just those that may be most useful for you. To see info about all the options, you can look at the Divi help video, accessible at the bottom of the module through the help link at the bottom.
Under Content – Posts number you can set how many posts you want to display on one page, before pagination starts to show at the bottom of the page, showing additional pages on the next page.
You can choose what categories the blog post module should show with the Include Categories setting. This functionality makes it possible to create several pages with this layout, each showing a different category of blog posts.
The drop down Content is set to content. This means that it shows our blog post content to where we have set the “read more tag”. If you change this to excerpt, you can’t use the read more tag, and Divi will instead use the excerpt to display as preview for each post on your blog roll.
We feel it is easier to just insert the read more tag. However, if you’d like to craft the preview text of your blog post completely for your posts, it being different than just the start of the post, you can use the excerpt setting here. To learn how to create excerpts, open the toggle below.
Using excerpts
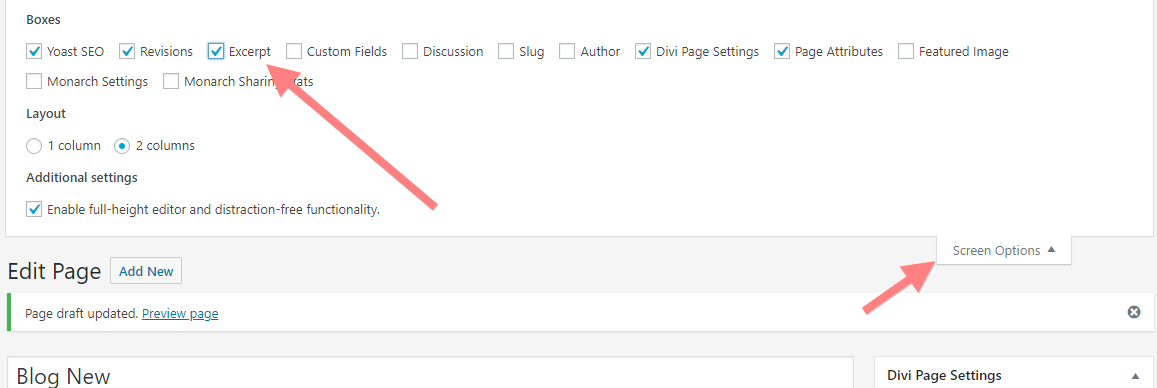
The excerpt text can be written in the excerpt box in the page. First make it visible by going to screen options and ticking the box excerpts:
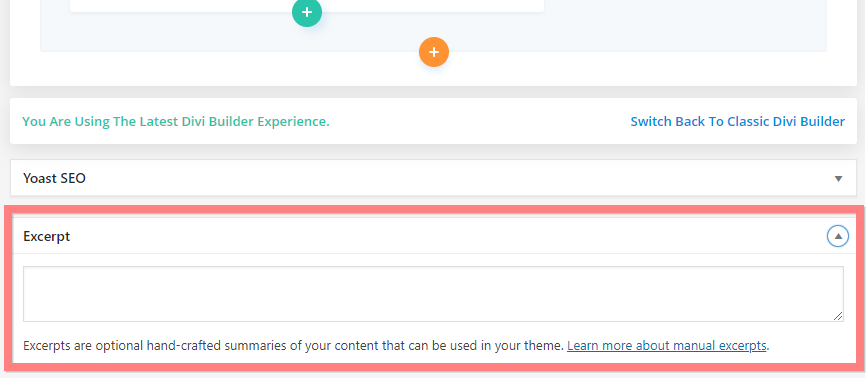
An excerpt box then becomes available near the bottom of your page (it is often collapsed closed so clock the little triangle to expand it) :
Under Elements:
Show Featured Image is set to no. This is because in our sample content, we start each blog post with an image, and this is the image that is shown at the moment also in our post preview. If you wouldn’t use an image at the start of your blog post, and you will only have preview text as a result, you can switch on the featured image here so that is shown in your previews.
You can also set the type of meta data you’d like to display here (the small text shown under the blog post titles, by using the toggles. We would leave pagination to yes, it controls visibililty of pagination links at the bottom of your blog roll page.
Switching your blog page
Once you have finished tweaking the settings of your page, you can switch over. Go to your old Blog page, and rename it, both the title and the permalink/URL, for example to blog-old:
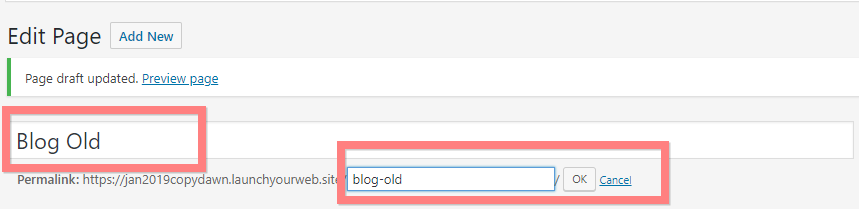
This is a necessary step, because unless we change the URL of the current page that is called blog to something else ( in our case blog-old), we can’t give another page the same URL, and the URL of your new blog page would become blog-1, which is not so nice.
We also need to change the page where WordPress automatically displays blog posts. Navigate to your dashboard > Settings > Reading, and in the Posts page drop down, click on -select- so that no longer a page is set:
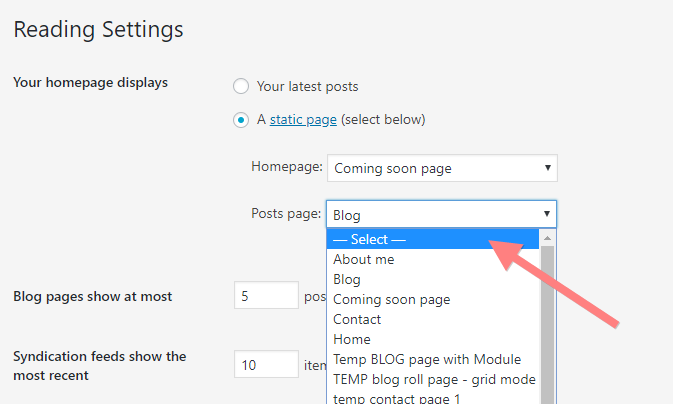
By making these two changes, we can now go back to our new blog page, and change the URL of that one from blog-new to blog:
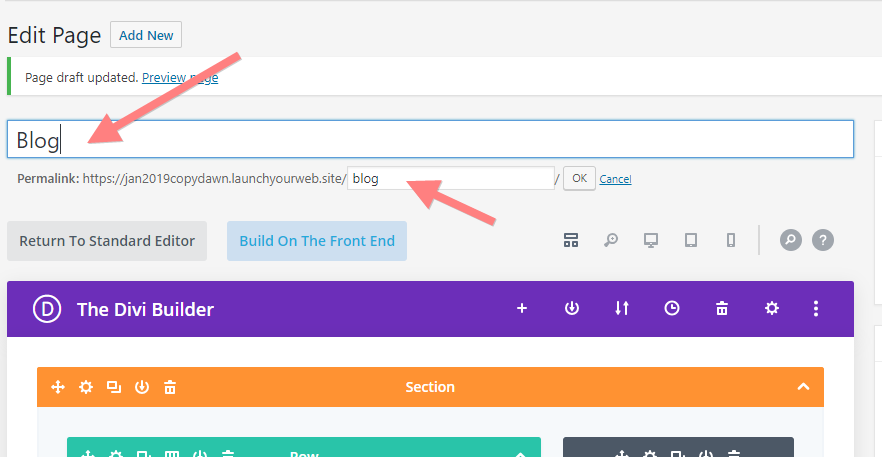
Of course you can also give your new blog page any other name! If you leave the name exactly the way it was before, you don’t need to go to your menus and add this new page. If you use a new name, go to Appearance > Menus to delete the old page from the menu and add the new page to your menu. Your new blog page is live!
Placing Read More Tags in posts created with Divi
To use this blog roll module in the way described above, you have to set Read More tags in your blog posts. We explain how to do that here.
2. Using the Blog Roll Grid Mode
You can also use the Divi Blog Roll Module in Grid mode which gives you a magazine style layout.
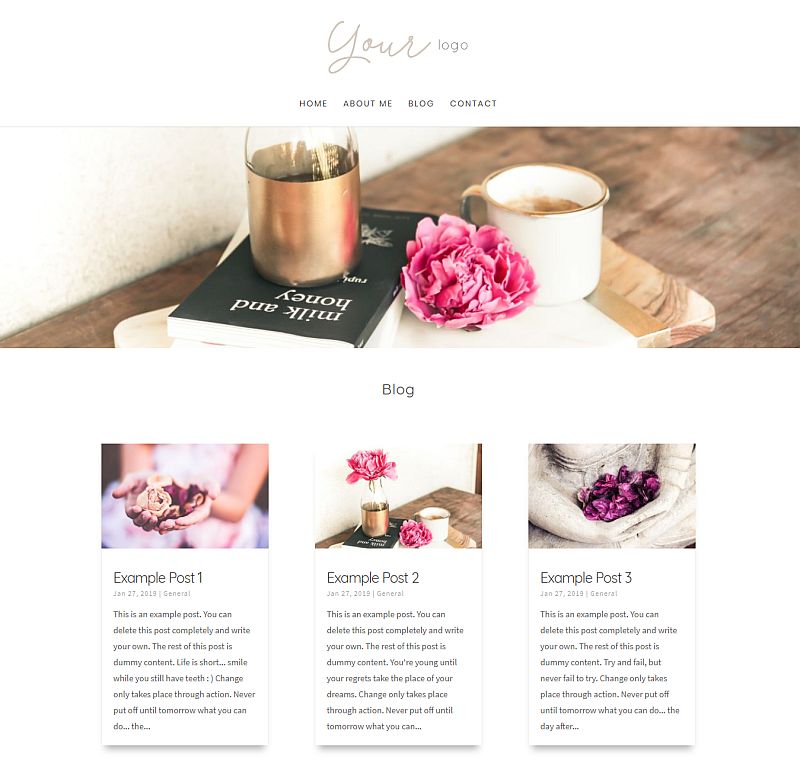
Whether the items are neatly lined up and of the same size depends on whether your featured images are all the same size, and also the preview text can be of slightly differing length which makes the items differ in height, but this can still give a nice dynamic effect.
Setting your blog roll page up with the Divi Blog Roll Module in Grid mode
First we are going to prepare your new blog roll page. To do so, create a new page and give it the title Blog New. Save the draft, and Click using the Divi Builder.
Load the layout “Blog Roll Page Grid Mode – Divine Website Pack” from your library into your page (the version number can vary, depending on when you bought your pack, to check if you have the latest version, go to the Layout Library, where you can always download the latest version).
You now see the layout in grid mode; there is a Full Width image at the top, followed by a Divi blog module that we have given the admin name Grid Mode Blog:
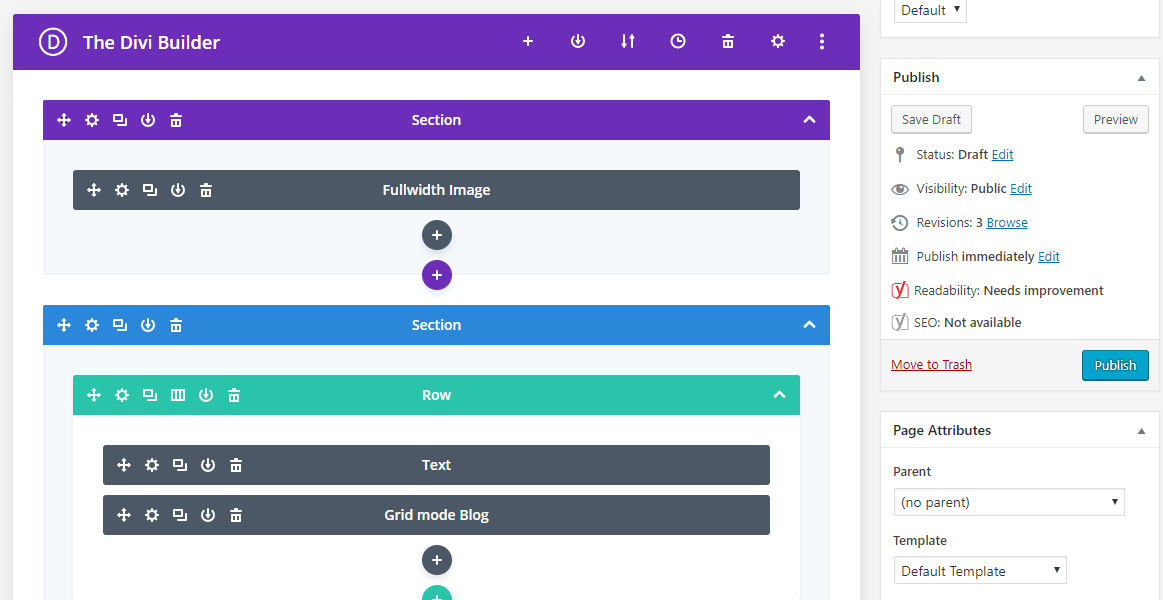
You can replace the fullwidth image by going into the fullwidth Image module.
Tweaking the Blog roll Module Settings
You can open the Blog module, to tweak some of the settings. We don’t describe all settings here, just those that may be most useful for you. To see info about all the options, you can look at the Divi help video, accessible at the bottom of the module through the help link at the bottom.
Under Content – Posts number you can set how many posts you want to display on one page, before pagination starts to show at the bottom of the page, showing additional pages on the next page.
You can choose what categories the blog post module should show with the Include Categories setting. This functionality makes it possible to create several pages with this layout, each showing a different category of blog posts.
The drop down Content is set to excerpt. This means that it shows short excerpt for each item. For the grid mode way of displaying your blog posts this is necessary.
Under Elements:
Show Featured Image is set to yes. Again, this is a necessary setting when using the grid mode. If you don’t see images for your items on the page, check if you have set featured images for your posts.
You can also set the type of meta data you’d like to display here (the small text shown under the blog post titles, by using the toggles. We would leave pagination to yes, it controls visibililty of pagination links at the bottom of your blog roll page.
Switching your blog page
Once you have finished tweaking the settings of your page, you can switch over. Go to your old Blog page, and rename it, both the title and the permalink/URL, for example to blog-old:
This is a necessary step, because unless we change the URL of the current page that is called blog to something else ( in our case blog-old), we can’t give another page the same URL, and the URL of your new blog page would become blog-1, which is not so nice.
We also need to change the page where WordPress automatically displays blog posts. Navigate to your dashboard > Settings > Reading, and in the Posts page drop down, click on -select- so that no longer a page is set:
By making these two changes, we can now go back to our new blog page, and change the URL of that one from blog-new to blog:
Of course you can also give your new blog page any other name! If you leave the name exactly the way it was before, you don’t need to go to your menus and add this new page. If you use a new name, go to Appearance > Menus to delete the old page from the menu and add the new page to your menu. Your new blog page is live!
3. Use the blog module to create a latest post section
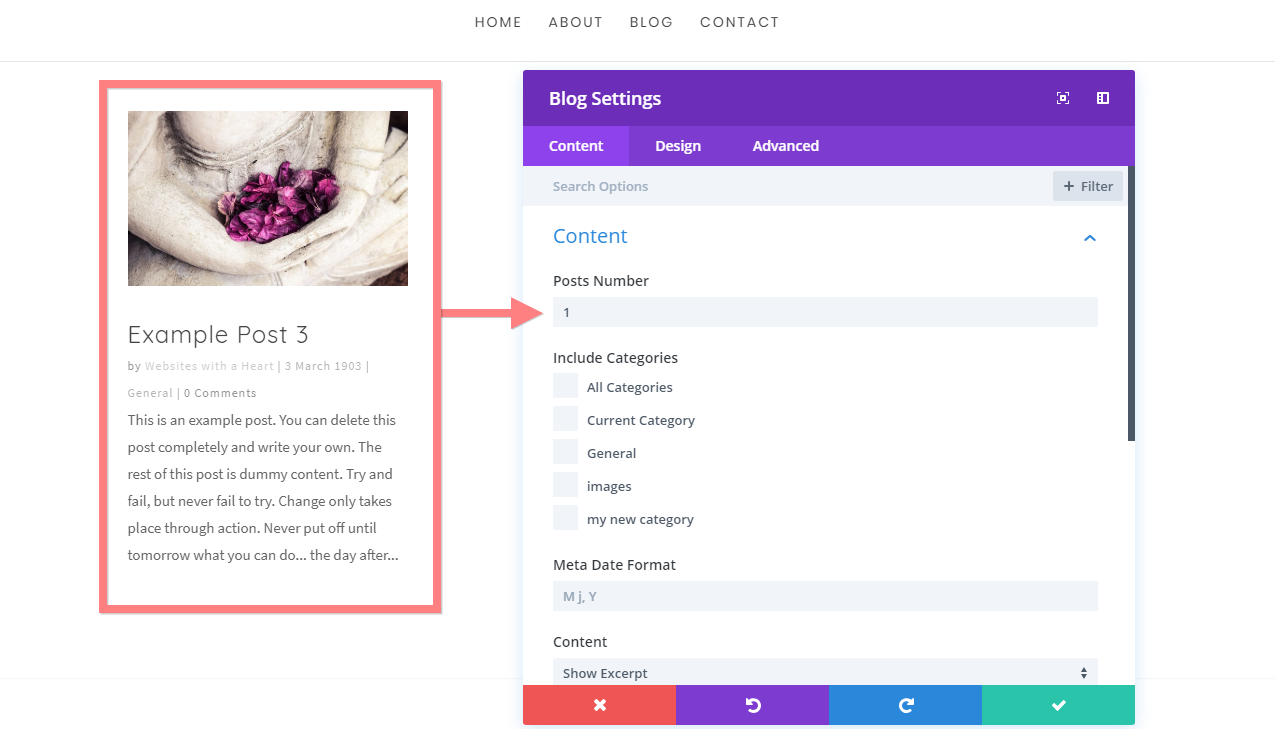
The Blog roll module can also be used to create a latest post item, for example on your homepage, or anywhere else in your website. You can do that by inserting it in 1/3rd column and then to specify that the number of posts should be only 1.
4. Use the blog module to show only posts of a certain category
You can also use the blog roll module to show certain types of blog posts on separate pages. For example, if you run a magazine style website, you could have a page “travel”, and on this page you only want to show your travel related posts. When you create a travel related blog post, you can give it the category travel. On the Travel page, you can insert a blog roll module, and in the module you can specify to only show posts with the category travel in the module.